Installation Noritz Boiler
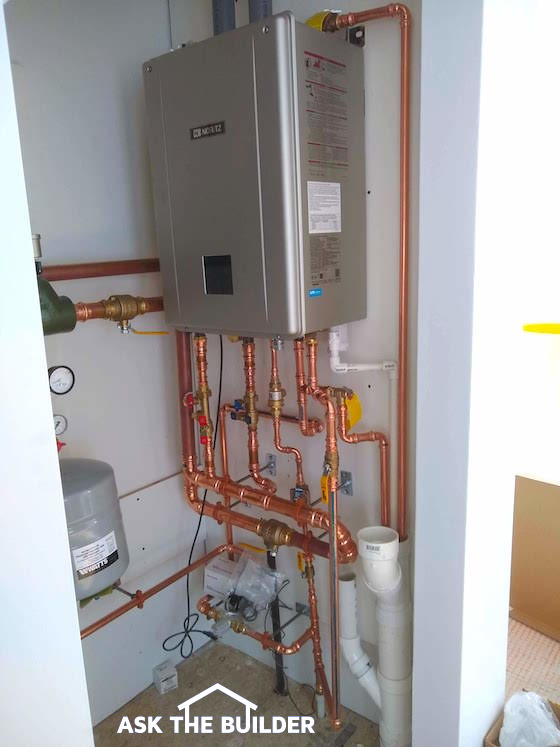
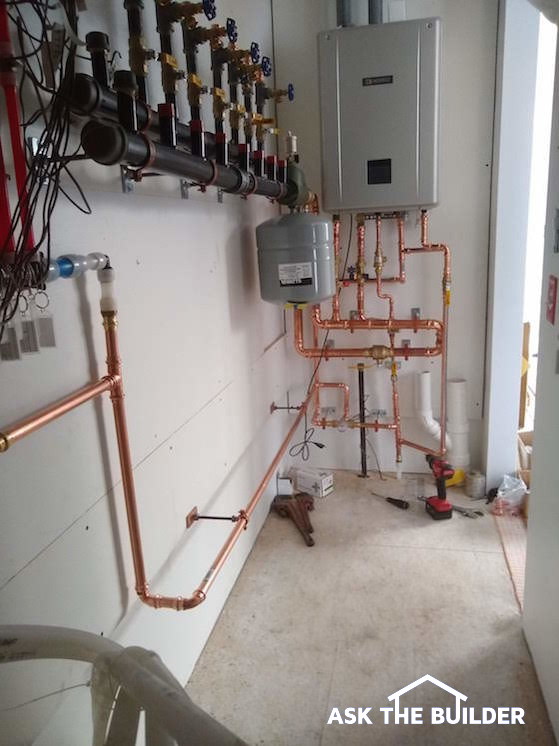
Installation Noritz Boiler | Here's all the piping complete on the Noritz NRCB boiler. I only had 23 total man-hours invested to do everything sans the electrical connections to the Grundfos Alpha2 recirculation pumps. Stop and think for a moment! How many MORE hours would have been involved if I had soldered all those copper fittings you see? Watch the video just below to see how those joints were completed in SECONDS!
Installation Noritz Boiler - NRCB Combi Boiler
I had the great pleasure to install a Noritz NRCB Combi Boiler in my daughter's new home in November of 2019. Read the backstory in my November 24, 2019 Newsletter.
Modulating Magic
One of the main reasons I love this Noritz Combi boiler is that it's a modulating boiler. This means that the fire in the boiler works like your gas stovetop. You adjust the flame on your stove to match what you're cooking, right? Sometimes you want the burner on full to maybe boil water fast, but other times you want a sauce to simmer so you have the flame nice and low.
This boiler has built-in intelligence to know how much flame, or Btus, to produce to MATCH the demand for heat. This SAVES YOU LOTS of money. Your current furnace may be one that is either on FULL BLAST or OFF - there's no between. That's how my old boiler was at my house.
It's important to realize I've been a master plumber since age 29 and have done all the aspects of working with copper tubing and black iron pipe for decades. You just combine these simple skills to complete the task.
CLICK or TAP HERE if you want to get FREE quotes from boiler installers in your city or town.
CLICK or TAP HERE to discover why I decided to use the Nortiz NRCB Combi Boiler.
Allow me to share the story using these photos. But first, watch this short video to witness the magic of newer technology revolving around how to create leak-proof copper connections in seconds. There's a rubber o-ring inside the raised ridge on the fitting. The tool crimps ever so slightly the fitting and the tubing squeezing the o-ring tightly against the tubing. You can see an o-ring right below inside the open end of the fitting:
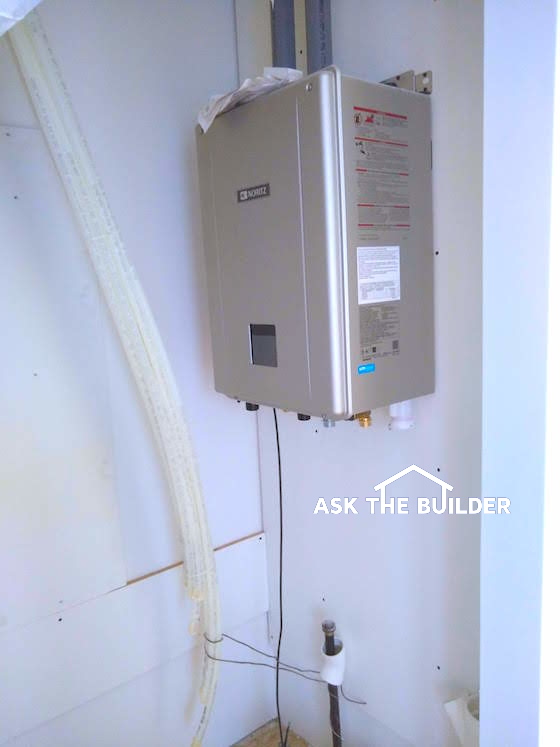
This is what the tiny closet looked liked the morning I started. The closet is but 3 feet wide and about 8 feet deep.
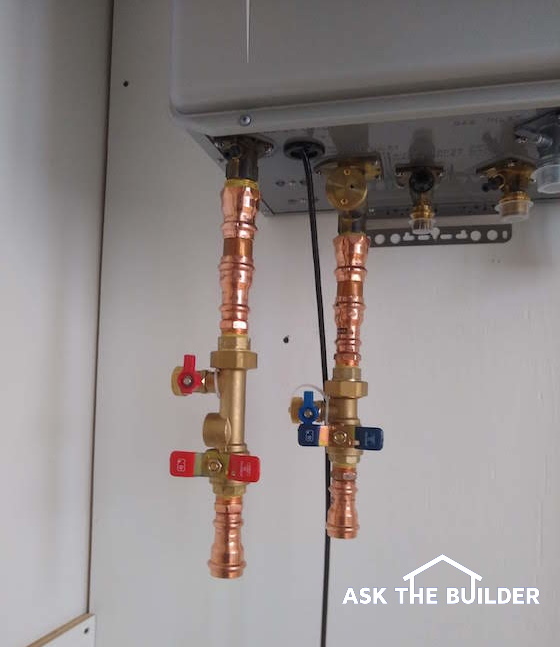
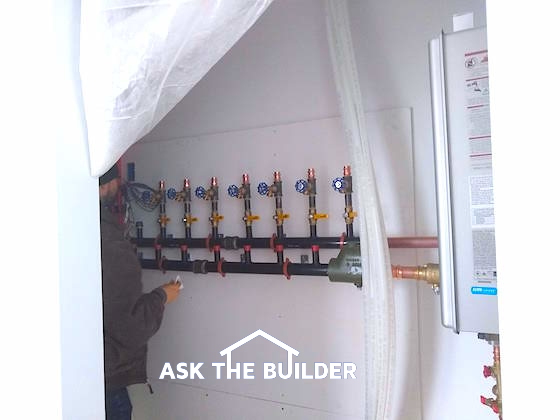
The first step for me was to install the isolation valves. You need to get this done so you know the height of the primary boiler loop. The pipes coming out of the boiler were 1 inch but the valve reduces down to 3/4 inch. I went back up to 1 inch to connect to the primary loop. There's no noticeable flow loss in that short distance. It's much like using a 5/8-inch water meter on a 3/4-inch water main coming into a home.
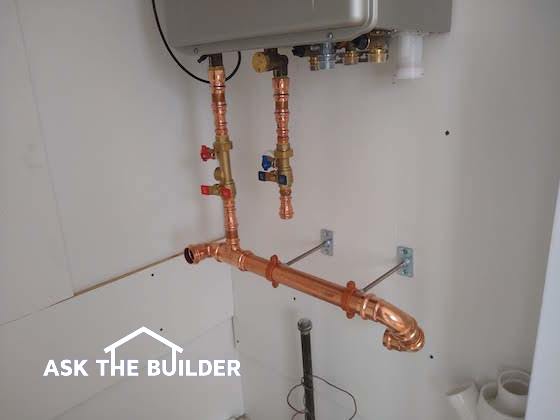
Here's the primary supply/return loop being built. That's 1.5-inch type L copper. It's vitally important that the tees for the two isolation valves be no more than 12 inches apart. The closer the better within reason. This is easy to overlook in the installation instructions as it shows up just as a small notation in an illustration. In my case, the center-to-center measurement for the tees was 7.5 inches. I haven't cut in the second tee yet because it had to be figured out using two 1-inch press copper 90s.
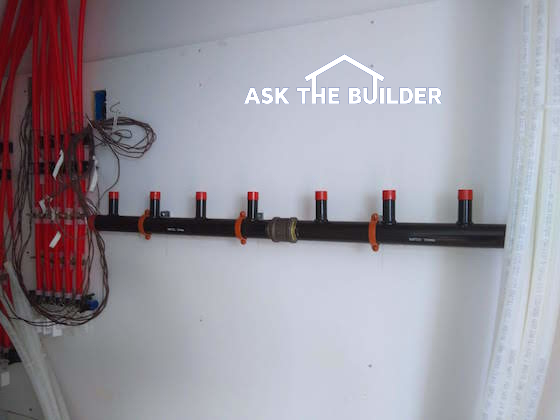
Here's the return header installed. It's a tight fit as the domestic hot water lines are showing up on the left side of the photo. There are seven zones in this house so the last short 3/4-inch nipple welded to the header on the left will go unused. I just put a 3/4-inch black iron cap on it. If I could go back in time, I would have raised this header up another 5 inches to minimize conflicts between the boiler drains you'll soon see and the Grundfos Alpha2 recirculation pumps.
The supply header is now installed and it's forward of the return header by about 4 or 5 inches. You need to make sure it's out far enough so the expansion tank doesn't hit the wall. You'll see that in a bit. If you don't know how these headers work, just think of your own vascular system in your body. Your heart is the boiler and the supply header here represents the core arteries where blood gets sent out to the different parts of your body. The return header represents your core veins that send your blood back to your heart to get a fresh boost of oxygen. In the case of the Noritz NRCB boiler, the return water gets reheated and sent back to the supply header. For every gallon of water pumped by the Alpha2 pumps out to the heating zones, a similar gallon of water is sent back into the boiler to get reheated.
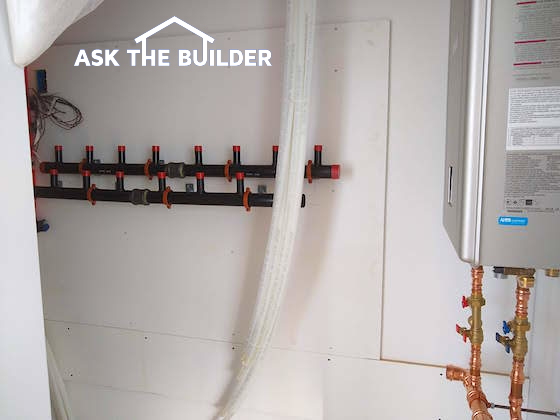
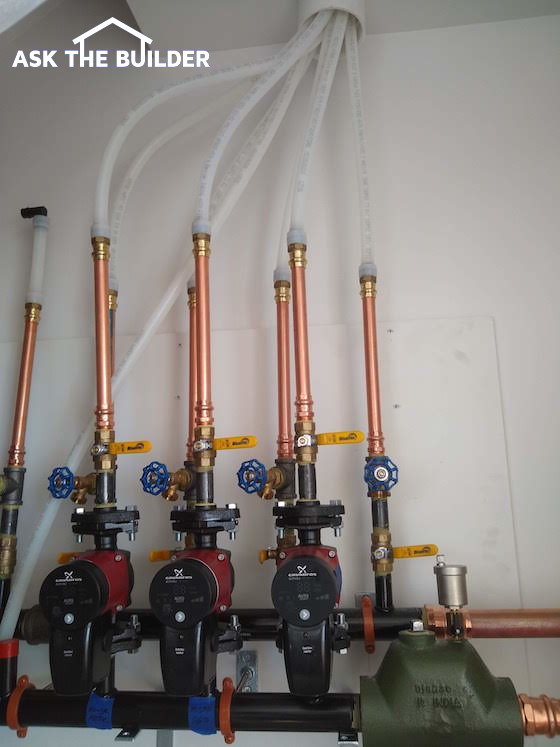
You're looking at the shut-off valves and boiler drains on the return header. It makes sense to install these first so you're not blocked by the Grundfos Alpha2 recirculation pumps. You'll discover very quickly that you need to offset the nipples rising off the headers as you don't want the pumps directly in front of the shut-off valves and boiler drains on the return header. The supply header is very heavy once the pumps are installed and you must provide sturdy brackets bolted to the wall or use threaded rods to suspend the header from the ceiling. Note the green air scoop that's on the right side of the supply header. This simple device removes air that is released from the water in the boiler. Air is dissolved in the supply water that enters the boiler. If air gets into the heating loop pipe, it creates an airlock and the water from the Alpha2 pumps doesn't recirculate.
This shot gives you how tight it is in this closet. I'm here to tell you that you want MUCH MORE SPACE. Believe me, you'll never regret having a room that's 10 x 12 to put all your stuff in. That way you can space out the supply and return headers for a much-less painful installation.
The first three Grundfos Alpha2 pumps are installed. The 3/4-inch Uponor hePex supply and return lines that extend out to the Uponor manifolds are connected. These manifolds distribute the hot water to all the individual loops in each zone. We installed about 6,000 feet of 1/2-inch Uponor hePex to the underside of all the floors.
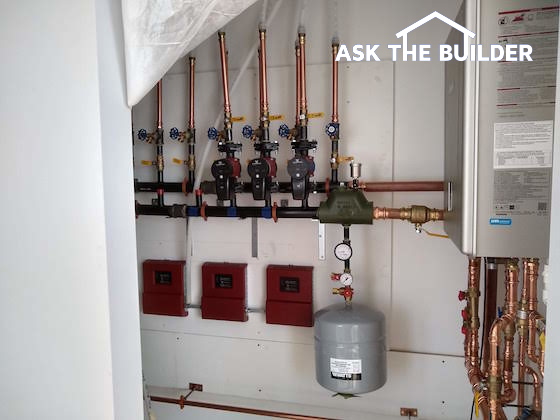
There's still a little bit of work to do, but you can see how everything fits together here in this small closet. The burgundy boxes are the computer controls for the Alpha2 pumps. Power will come out of each of the boxes and extend to each Alpha2 pump. The wiring is really not tough, although at first, it seems intimidating. You just have to read the instructions!
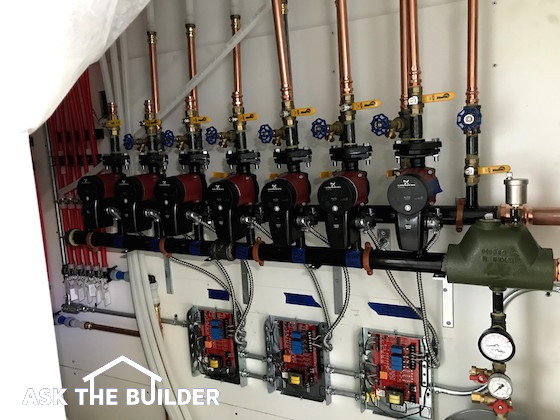
Here you can see all the Alpha2 recirculation pumps are installed. BX flexible cable has also been run to the pumps. We're just about ready to turn on the boiler!
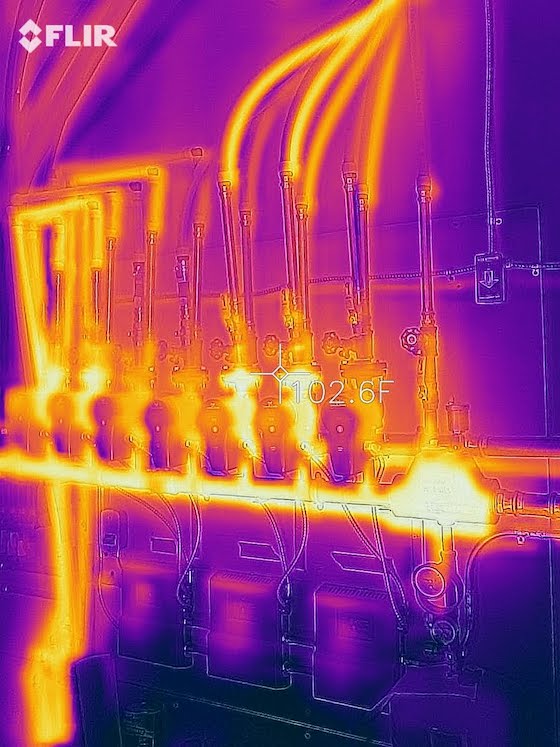
Infrared Photos | These are the heating supply pipes in my daughter's new home. Can you tell how many zones of the seven are calling for heat? Can you see which are the outgoing supply pipes with hotter water than the return pipes coming back to get reheated? Can you see why having one of these infrared cameras is such a good idea?

Here's a peek at some of the 6,000 feet of Uponor hePex that's going to keep the floors in the house toasty warm. You bet I'm happy as this was a complex job that we completed using the three D's: diligence, discipline, and determination.
11 Responses to Installation Noritz Boiler