How to Drive Finish Nails into Wood
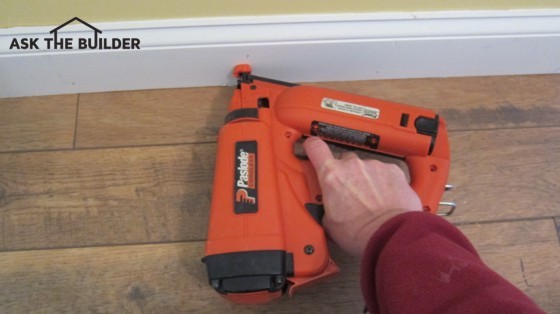
This gas-powered impulse nail driver does a marvelous job of driving finish nails. Copyright 2017 Tim Carter
How To Drive Finish Nails TIPS
- Nail sets are what pros use to countersink finish nails
- Match nail set to finish nail head size
- WATCH finish nail videos below
- Power nailers prevent beauty marks
- CLICK HERE to Get Tim's FREE & FUNNY Newsletter!
DEAR TIM: I was helping my boyfriend install some wood trim this weekend and had a disagreement with him. It was about how to drive finish nails into wood.
He's of the opinion you should drive them flush with the wood and then paint over them. I remember my dad using a small tool he tapped with a hammer to drive the nailhead below the surface of the wood.
Then he'd put spackle over the nail to hide it. Can you settle the dispute and offer any tips on how to install finish nails professionally? Becky S., Kissimmee FL
DEAR BECKY: Sometimes I don't like playing the part of Solomon when it comes to domestic squabbles. But in this case, I'll jump in feet first since it's a topic I feel I can offer sound advice.
Boyfriend's Reality
Your boyfriend may want the rustic look, in which case his method will just barely pass. Everyone has their own reality when it comes to a preferred and acceptable look. As crazy as this sounds, your boyfriend may feel that his method produces the most pleasing finished look of all.
Free & Fast Bids
The Pro Look
Your dad, in my opinion, taught you the proper and time-tested way to countersink a finish nail. The tool your dad tapped with a hammer is called a nail set.
Nail Sets
Nail sets come in different sizes to match up with the head of the finish nail being driven or set. A nail set is a solid piece of tooled steel that has a square or round surface you tap with a hammer.
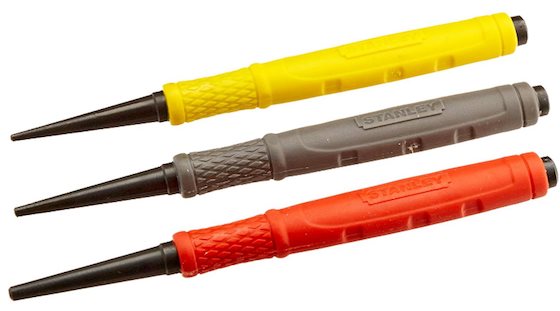
These are standard nail sets. The yellow one has the smallest tip. These are very affordable and work well. CLICK THE PHOTO to have these nail sets delivered to your doorstep in days.
The tip of the nail set tapers so the tip is quite small, usually slightly smaller than the diameter of the head of the finish nail that's being set.
Match Tip To Nail Head
It's important the tip of the nail set toolis smaller than the nail head. You want the smallest hole possible in the wood to fill or disguise. This is especially true if the wood is to be stained and coated with a clear finish.
In these situations, you want small holes that can be filled with a wood filler that matches the finished color and grain of the wood.
Steady Hand
Using a nail set is not easy. Driving nails in finished wood trim is an art. To develop great skill, you must practice.
No Beauty Marks
The common mistakes rookie carpenters or homeowners make are large bruises or "beauty marks" made by a hammer head that strikes the wood. Believe me, I've done this on more than one occasion. These marks are very difficult to repair and hide.
Precise Hammer Blows
Driving finish nails requires deft hammer blows. The head of the hammer needs to hit the head of the finish nail squarely and the hammer must hit the nail so the head of the nail contacts the center of the hammer.
IMPORTANT TIP: Drive the nail with authority, but not full hammer blows. Depending on the size and length of the finish nail, you'll discover you may only need 4 to 6 inches of hammer travel to develop enough force to drive the nail.
If the nail is driven just one-quarter inch with each hammer blow, that's sufficient. Remember, you can't have the hammer touch the wood.
Stop & Set
When the top of the nail head is about 1/4 to 3/8 of an inch away from the surface of the finished wood, stop hitting it with the hammer. It's now time to use the nail set.
Place the tip of the nail set in the center of the nail head and tap it lightly with the hammer. The nail may only move 1/16th inch with each hammer blow. This is fine. It's all about precision, not power.
Line It Up
If you don't have the nail set lined up directly with the nail, the nail set will jump off the head of the nail and make a new hole on the side of the finish nail. This is unacceptable if the wood will be stained.
If the wood will be painted, you can fill this extra hole with spackling compound.
Create The Recess
The trick is to drive the finish nail so the top of its head is about 1/16th inch below the surface of the finished wood. This is not as easy as you might think, and the degree of difficulty depends on the size of the finish nail.
Larger finish nails are much harder to countersink than small ones because the larger nails offer more resistance when you're driving them.
Practice On Scrap
If you've never done this before, you should practice using scrap finish lumber. I would create a simulation where you have a couple of pieces of framing lumber nailed together.
Nail a small piece of drywall to the pieces of rough lumber. Then try to nail a piece of finish trim to this assembly.
Twenty-Five Times
Drive and countersink at least 25 nails before you advance to a real piece of trim. When you do start to nail real pieces of trim, start in a closet or on baseboard you know will be hidden with furniture.
The last thing you should nail is a piece of door or window casing at eye level where the mistakes you make will be visible for all to see.
Power Finish Nailers
If you want to avoid the possibility of making a mistake, consider using a powered finish nailer. These tools have been around for decades and they drive and countersink finish nails with the squeeze of a trigger.

This is my favorite finish trim nailer. It is powered by propane and a lithium-ion battery. No air hoses or noisy compressor needed! CLICK THE IMAGE NOW TO BUY THIS GREAT NAIL GUN.
The tools drive all sizes of finish nails from 2.5 inches long and normal nail diameters down to tiny 1/2-inch long pins. These pin nails are so thin, they look just like a straight pin. They're made to attach small pieces of decorative trim.
Finish Nail Gun Video
Watch this video to see how to use a finish nail gun.
Different Power Sources
The nail guns can be powered by compressed air, electricity or propane. I've used all different types of these finish nail guns and they all work well. I prefer to use the guns that don't require compressed air as the air hoses and air compressors can be a problem to work around.
How to Remove Finish Nails Video
Here's a handy trick to help you remove finish nails when salvaging trim lumber.
Column 1014
5 Responses to How to Drive Finish Nails into Wood