Hardwood Repair

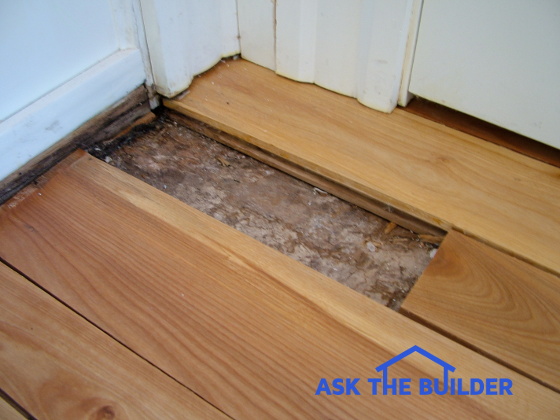
This hardwood repair is going to take some effort. The interlocking pieces of flooring need to be carefully removed. ©2017 Tim Carter
Hardwood Repair TIPS
- Toughest repair job in the average house
- Hire a pro to get it done correctly - very frustrating for a DIYr
- Cut out center of damaged piece carefully
- Stain and finish challenges face you after difficult repair!
- CLICK HERE to Get Tim's FREE & FUNNY Newsletter!
DEAR TIM: I'm faced with a hardwood floor repair. Water seeped under my front door and caused the floor to warp. What's involved in a hardwood-floor-repair job like this?
I'm usually not too timid when it comes to home repair issues, but I'm feeling out of my comfort zone. I realize the hardwood floor is made up of interlocking pieces, and for the life of me I can't figure out how to remove single pieces much less install new ones. Dan B., San Jose, CA
DEAR DAN: I'll tell you what's involved in a hardwood repair like this, lot's of frustration and pain.
Very Tough Job
This is a task that's often best left to a hardwood-flooring professional. You can probably work your way through the job, but a professional will probably be able to complete the task and be on the road to the next job while you are still futzing around with the wood chisel.

CLICK this image and listen to the first call on the podcast. I talked to Jill about how to repair wood kitchen flooring, and possibly installing an inlay border as an option. Copyright 2018 Tim Carter
Interlocking Pieces of Wood
Hardwood-floor repair is difficult because of the shape of each piece of hardwood flooring. Full-size pieces of hardwood flooring are typically three-quarter-inch thick and they have either a tongue or groove profile on each of the four side edges. The tongue interlocks into the corresponding groove on an adjacent piece of hardwood flooring. This means you can't just pry up a piece of flooring as you might pull up a board on your outdoor deck.
CLICK HERE to get FREE & FAST BIDS from local hardwood floor installers who can do this repair.
Remove Center Carefully
Different hardwood-flooring professionals may have different techniques for removing a single flooring board, but just about every one of the pros will start by carefully removing the center one-third or so of the damaged floor board. By doing this, you can pull the remaining two pieces sideways away from the adjacent flooring towards the center of the space.
If you try to pry up the pieces of flooring, you can crack off the tongue and or groove of the good pieces of flooring you're trying to salvage.
Frustration Guaranteed
You'll become extremely frustrated early in the hardwood-repair process. You'll probably use a circular saw to start the process of removing the center of the damaged piece of hardwood flooring. Carefully set the depth of the blade so it cuts the hardwood flooring only and not into the subfloor beneath the hardwood.
Vibrating Multi-Tool
Because the saw blade is circular, it will not be able to cut full depth to the outer edges of the hardwood strip flooring. You'll have to finish that task carefully with a router or a wood chisel. You may also decide to use a vibrating multi-tool equipped with a wood blade.
This operation will require extreme patience, skill and precision as you can't touch the adjacent pieces of finished hardwood flooring with the tools. If you do, then you'll be replacing multiple pieces of hardwood flooring.
Exact Size Required
Once you've got the old piece of ruined flooring out, it's time to conjure up every ounce of master-finish-carpentry skill you have. You have to produce a piece of new hardwood flooring that is the exact size of the one you removed. Your tolerance for error is perhaps the thickness of a piece of paper.
CLICK HERE to get FREE & FAST BIDS from local hardwood floor installers who can do this repair.
Cut Off Bottom Groove
But note that you have to get the new piece of flooring into a rectangle that has two tongues and two grooves. The only way you can do this is to cut off the tongue on the short edge and cut off the bottoms of the two grooves on your replacement piece of hardwood flooring.
Even with these advantages, it can be a tremendous challenge to insert the new piece of hardwood flooring without damaging the tender edges of the new piece as well as the adjacent pieces you are working against. This stage of the project will require every bit of patience and skill you possess.
Face Nail
Once you have the new piece of hardwood flooring nested into position, it needs to be face nailed. Because you've worked so hard to get to this point, don't ruin the wood by splitting it. I recommend drilling pilot holes that are slightly smaller than the diameter of the special blunt point finish nails you need to use.
Special Blunt Nail
Don't use regular finish nails. There are special finish nails that have a tip that is fairly blunt. You can get these from a real hardware store or from a professional that regularly installs hardwood flooring. While you are picking them up from the pro, be sure to ask him if he has an opening in his schedule to bail you out. My money says you will be calling him to finish what you start.
Hardest Repair Job Ever
Hardwood floor repair ranks as one of the hardest repair jobs I know of in the typical house. It's so technically challenging, you simply can't believe it until you try it. The margin for error is razor thin.
Stain & Finish Challenges
Even if you succeed at getting the new piece of hardwood flooring in, you now have to get the stain and finish to match the adjacent pieces. This is sometimes even harder to do than getting the wood strip into place! It's a true gift the talents a pro finisher has in matching the stain color and level of sheen on the floor finish. If you succeed at doing this yourself, you either have great skills or you should immediately go purchase a lottery ticket.
DIY Refinish Product
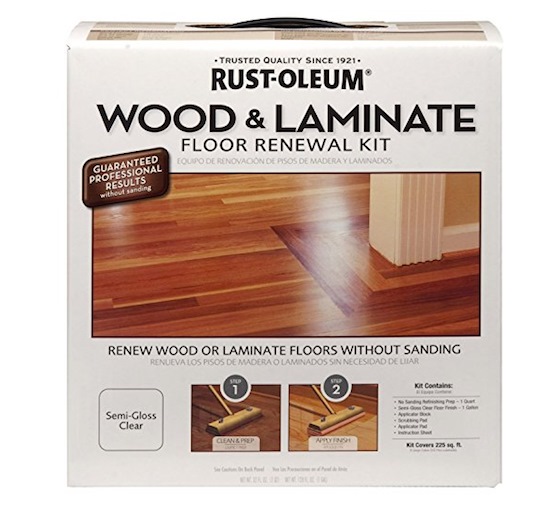
If you want to refinish the floor around the repair, here's a NO SANDING method. It's all liquid. Magic in a bottle.

This is the wonderful DIY floor refinishing system. It's not hard to do. Just be sure the floor is CLEAN first. Use Stain Solver to clean the floor. CLICK THE IMAGE TO BUY this refinish system.
CLICK HERE to get FREE & FAST BIDS from local hardwood floor installers who can do this repair.
Column 747