Solder Tips for Copper Tubing

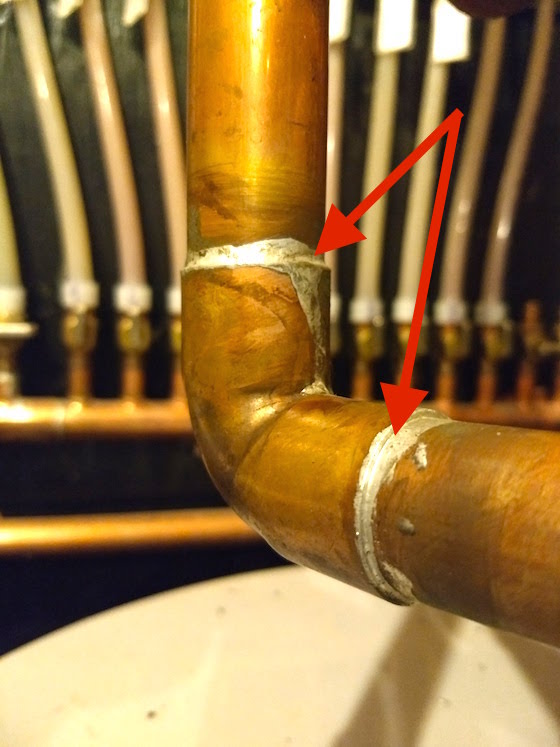
How to solder copper pipe - You do this when you melt the solid solder and allow it to flow into the tiny gap between the tubing and the fitting. The red arrows point to the silver-colored solder. Copyright 2018 Tim Carter
"The biggest mistake a rookie makes soldering copper is they allow the heat of the torch to melt the solder. Do NOT do that."
How to Solder Copper Pipe Checklist
- The copper tubing and fittings must be clean
- Stir up the flux paste
- Use lead-free solder
- Copper must be heated so it melts the solder NOT the torch flame
- Watch the following video:
How To Solder Copper Pipe - MOST IMPORTANT TIP OF ALL
The biggest mistake a rookie makes soldering copper is they allow the heat of the torch to melt the solder. Do NOT do that. You must heat the copper tubing and fitting for about ten or fifteen seconds before touching the solder wire to the hot copper.
The HOT copper will melt the solder, not the torch.
To solder copper pipe you must heat the copper pipe and the fitting to be soldered to a sufficient temperature. When the copper is hot enough, it will actually draw the solder into the joint by capillary attraction. Believe it or not, the solder will actually flow uphill.
What is the Best Torch to Use?
A simple propane torch that uses screw-on bottles will adequately solder pipe up to 3/4 inch in diameter.

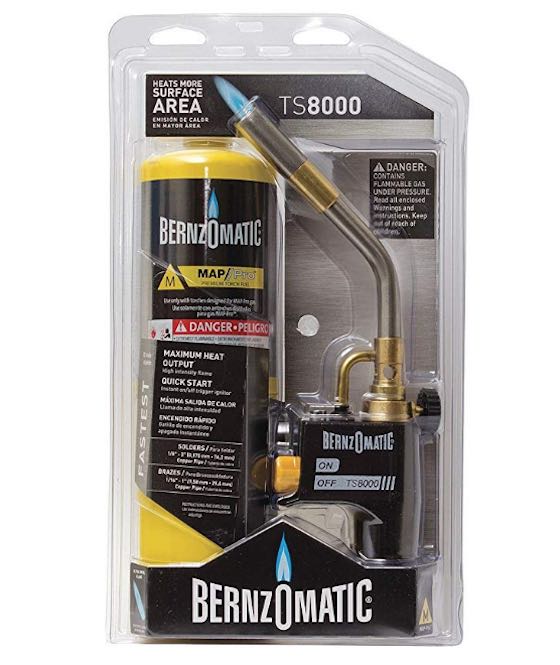
This is a great torch kit. This one is MAP gas which burns hotter than propane. A regular propane tank will fit the torch. CLICK HERE or the photo to have this delivered to your home in days. WATCH the video of it below.
Plumbers generally use acetylene torches for two reasons. The acetylene burns hotter than propane allowing for faster solder times. The acetylene is available in larger tanks which attach to handy hoses and lightweight torches. If you want acetylene, you just need to go to a large plumbing supply house or a place that services welders.
What Types of Solder Can I Buy?
Solder, which is available in leaded and no-lead versions, attaches to the pipe on a molecular level.

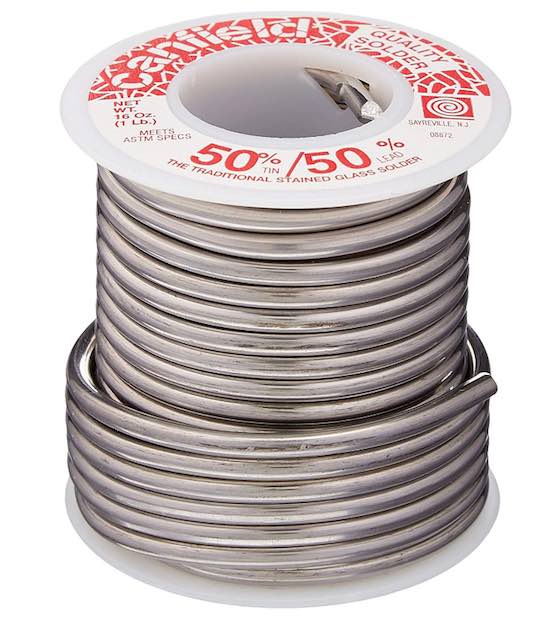
This is solder that has a 50 percent lead content. Look at the numbers on the end of the spool. Do NOT use this solder for water pipes for drinking water. CLICK THIS PHOTO to buy the solder for use in leaded glass, soldering wires, and other projects.

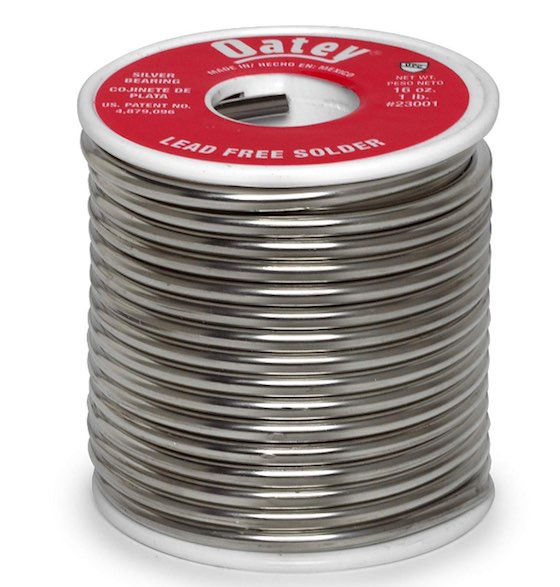
This is lead-free solder. Use THIS SOLDER for a copper pipe that drinking water passes through. CLICK THE PHOTO NOW to have it delivered to your home in days.
How Does Solder Work?
Solder works by bonding to the copper pipe when it's heated. It's very similar to how two pieces of steel get welded together.
The surface of the soldered joint actually becomes an alloy where the copper and solder intermix.
Why Does the Copper Need to Be Clean?
The copper pipe needs to be clean so the atoms of copper can easily bond with the atoms of molten solder. The solder WILL NOT BOND if the copper is oxidized or dirty.
For this to happen, the copper must be very clean and free of oxidation. You can clean copper pipe in any number of ways. You can use coarse steel wool, sandpaper and/or a wire brush. Special round wire brushes come in a variety of sizes to clean the inside of copper fittings and valves. Simply twist the brushes or pipe to clean them. Even if you purchase a new copper pipe, it should also be cleaned. You only need to brighten the area which is to receive solder.
Why Do I Need to Use Flux?
Flux is a chemical which helps you solder. Flux prevents the copper from oxidizing as you heat the copper with the torch.
It actually finishes up the cleaning job you started with the sandpaper and brushes. In addition, it prevents the pipe from oxidizing as you heat it. You can solder without flux, but it is really difficult! Flux is applied to both the pipe and the fitting with a handy miniature paint brush. You do not need massive amounts to be effective. Besides, once you start to heat the pipe, 90 percent of it boils off and evaporates.
What are the Different Types of Solder?
Solder is available in generally three types: 50 percent lead/50 percent tin; 95 percent tin-antimony/5 percent lead; and lead-free solder.
Any water supply pipe should be soldered with solder that contains no more than 5 percent lead. If possible, use the lead-free solder. The 50 percent lead solder is used for copper drain lines. It melts at a lower temperature and is able to bridge larger gaps as it cools. This is handy when working with large diameter (up to 4 inches!) copper pipe and fittings. You MUST pay attention when you buy solder. The 1 pound rolls look very much alike. Carefully look at the label as you might purchase the wrong one.
How Do You Light a Torch?
Plumbing torches can be lit with matches, lighters or preferably a flint striker. Some torches have built-in igniters. Watch this video:
CLICK HERE to purchase the torch you see me use in the above video.
Matches and lighters can be dangerous, as you might not put them out. A flint striker makes sparks which ignite the flame. Plus, a single flint in a striker can last a homeowner 10 years or more! Flame temperature is important. You need to set the flame on medium or high to generate enough heat to melt solder. If your flame is adjusted correctly, it will burn different shades of blue. You will notice at the center of the flame a darker blue section that comes to a point. This is the hottest part of the flame. You apply this part of the flame to the copper pipe.
How Do I Heat the Copper Pipe?
Don't be afraid to heat both sides of the pipe. Rotate the torch around the joint for even heat distribution. When I use my acetylene torch and I am soldering 1/2 inch pipe, I can usually heat the pipe to the correct temperature in 10 seconds or less. A propane torch may take 15 to 20 seconds.
How Do I Prevent a Fire When Using the Torch?
You prevent a fire by using a thin piece of sheet metal as a heat shield. Place the shield in between the copper tubing and anything flammable.
Always look beyond the pipe. Extremely hot temperatures extend out beyond the visible portions of the flame.
You can easily scorch lumber or wires. If you are soldering near old lumber or in joist spaces near vertical walls, you can start your house on fire easily. Be careful and use flame shields. These are flame resistant fabrics or simple pieces of sheet metal which absorb and/or deflect the heat.
Always have a 5-gallon bucket of water handy in case you do start a fire. If you have water still on in the house and can have a charged garden hose right next to you, that's the best thing.
Click here to watch a video on soldering copper pipes and fittings.
How Do I Apply the Solder?
As you heat the pipe and fitting you will see the flux begin to boil and evaporate. Once the flux stops boiling the pipe is generally hot enough to solder. Move the torch away and touch the solder to the pipe.
It may take 2 to 3 seconds for the solder to melt. If the pipe is horizontal, apply the solder to the top of the pipe. The solder will roll around in an instant.
If you have done the job right, a droplet of solder will be at the bottom of the joint. You can flick this molten solder away with an old rag.
Blowing on the joint will allow it to cool. It will be hot, but rub the joint quickly with an old rag to remove flux residue. This will also polish the solder. Check the joint closely to see if you see a silver colored band around the entire joint. If so, your first solder joint may be perfect. As I would say on a job, "Another quality installation!"
Column B353


3 Responses to Solder Tips for Copper Tubing