Roof Framing Basics

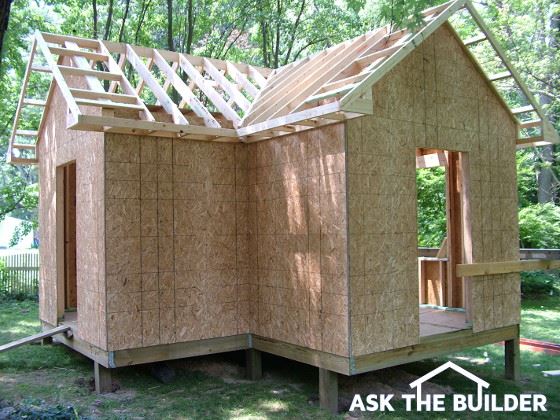
This shed roof has three basic roof-framing components: standard rafters, a hip on the other side and the valley rafter set you see front and center. The sturdy overhangs are also easy to build. PHOTO and FRAMING BY: Tim Carter
DEAR TIM: Many older homes I have been in have wide-open attics, and the roofs were built without modern trusses. Is it still possible to frame a roof the old-fashioned way? Is it hard? What special tools do you need to frame a roof the way old carpenters did it? What other tips can you offer? Jacob N., New Holland, PA
DEAR JACOB: Oh, you bet it is still possible to build roofs the same way carpenters have done for hundreds, or even thousands, of years. This practice is still alive and well; many carpenters who operate under the radar frame roofs this way each and every day. Trusses are wonderful engineering marvels for modern carpentry and production building. Just about any roof shape or design can be framed using trusses. But often it is just as fast and cost-effective to frame a smaller roof using regular lumber, and a few common tools.
The art of roof framing is indeed a craft. There are many nuances and tricks that can take years to master, but simplistic and basic roof framing can be learned in as little as 30 minutes. The trick to simple roof framing is to ensure the wall system that the roof rests upon is level, plumb and square. Square means that all corners are true 90-degree angles. It is possible to create a square layout for the roof framing on top of walls that are not square, but believe me, it is so much better if the rough carpenters take the time to frame the walls so they are square.
Years ago it was not as critical to have the roof perfectly square. Once the roof framing and rafters were in place, they were covered by individual 6-inch-wide or slightly larger pieces of lumber. It was easy to cut the lumber to fit out-of-square rafters. But today, carpenters use large 4-foot by 8-foot sheets of plywood or oriented-strand board to rapidly cover the roof rafters or trusses. If this framing is out of square, it can be a nightmare to fit these large pieces of lumber along the narrow edge of each rafter.
In reality, you need three very simple tools to cut regular roof rafters, hip and valley rafters and the small jack rafters that intersect hips and valleys: a saw, framing square and tape measure. The only two dimensions you need to know to make all of the necessary cuts are the actual pitch of the roof you desire and the overall width of the span that the roof will cover. Simple geometry takes over at this point.
If you look at a modern high-quality framing square, it has a large number of measurements and tables on the tool. These are magic geometric numbers that were calculated years ago and tell you exactly how long to cut certain rafters if you know the roof pitch and the overall width that the roof spans.
Roof pitch refers to the angle of the roof or the amount of its slope. It is commonly defined as the number of vertical inches a roof rises per foot of horizontal run. For example, a building plan may call for a 6 / 12 pitch roof. Pitch is defined as the "steepness" of a slope. You can use numbers to communicate this relationship. In this case what the architect is trying to convey is that he wants the slope of the roof to go up six inches for every 12 inches horizontal run.
Mathematicians look at pitch differently. They take the total rise of the roof and compare it to the total span of the roof and determine the actual ratio. For example, a roof that has a total rise above the exterior wall top plate of 6 feet and a total span of 30 feet would be a 1/5 pitch roof.
The overall width of the building is that measurement where the outside surfaces of two parallel exterior walls end. Carpenters often refer to this as the building line. If you go back in time to when you were sitting in your high-school geometry class, you should be able to quickly visualize this overall-width dimension is nothing more than the bottom line of a triangle. The two roof rafters that slope and eventually rest on the exterior walls represent the other two lines of the triangle.
The framing square used by carpenters is nothing more than a right triangle and when you adjust it on the side of a piece of lumber, it produces two accurate cut lines. A right triangle is one that has a 90-degree angle where two of the lines intersect.

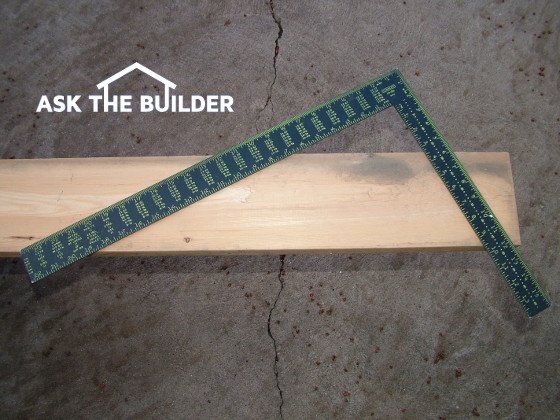
This framing square creates the plumb-and-heel-cut lines. Right now it is set for a 6 / 12 pitch cut. The line on the right will be the plumb cut and the longer line on the left is the heel cut that rests on top of the wall. PHOTO CREDIT: Tim Carter
One of these lines is called the plumb cut. The plumb cut creates a line that is perfectly plumb, and is used where the roof rafter contacts the ridge board at the top of the roof. An additional plumb cut is made near the bottom of the rafter in the notch where the rafter passes over the exterior wall. Plumb cuts are also required where a rafter intersects a hip or valley rafter. The framing square also produces a second cut line called the heel cut. This cut line is made on the rafter where the rafter sits flat on top of the exterior wall.
The tables and numbers on a framing square are accurate, but modern construction calculators really are the tool to use to calculate the length of rafters. These very inexpensive tools do all of the mathematics in the blink of an eye. They also need a minimal amount of data entered to produce extremely accurate dimensions for any type of rafter you might cut.
The trick to becoming comfortable with roof framing is to frame a very small roof at first. For example, just try a simple roof that would sit on a box that measures 2 feet wide by 32 inches long. You will be shocked how simple it is to make perfect cuts so the rafters meet at the top, with no gap whatsoever.
Column 578
11 Responses to Roof Framing Basics