Rock Retaining Walls and How To Grout Floor Tile

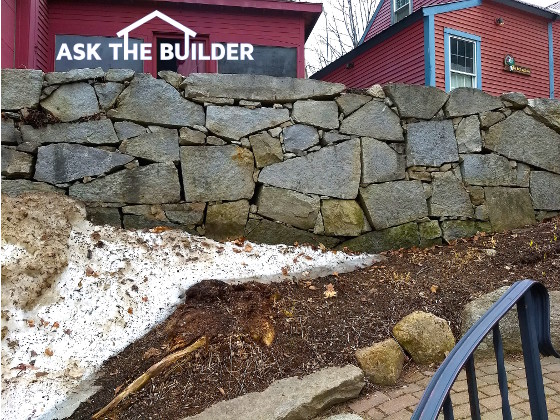
You can use forgotten technology to lift some of these heavy stones yourself, but it’s very time-consuming. It might be better to use a backhoe that’s got a thumb. (C) Copyright 2018 Tim Carter
Rock Retaining Walls
Question #1: Tim, I read a column on your website about rock retaining walls. I’m having a hard time believing you can build a lasting wall and not use mortar between the stones. I’d love to just build a wall and not have to use mortar. What’s the real secret? Karen - Bethesda, MD
I routinely receive inquiries at my Ask Tim page at my website just like Karen’s question. You may be a person that marvels at retaining walls that hold back earth without using mortar or poured concrete.
You were exposed to why the stacked stone works during your high school physics class. It’s possible you were sick that week, so I’ll cut you some slack. There are several formulas that might make your head hurt, but it’s just about mass and friction.
The soil behind the wall is responding to the force of gravity. It wants to be pulled closer to the center of the Earth. Any retaining wall that works, is designed to provide a force greater than the pull of gravity thus holding back, for a time, the hillside no matter how big it is.
Think about how easy it is to push a stone along the ground that’s the size of a baseball. It requires little effort. Try pushing an angular boulder the size of a dishwasher and you’ll need to enlist the help of a few friends to get it to move.
Here are a few tips to help you succeed when building a stacked stone retaining wall. The first step is to dig down into the soil and remove the topsoil from where the base of the wall will be anchored. You want the wall to be in the ground at least 6 inches and 12 would be better.
If the wall’s going to be taller than about 3 feet, you should tilt the face of the wall so it leans back into the hillside. The forces that push against the wall increase at an exponential rate as the wall gets taller. As you double the height of a typical wall, the pushing force to tip it over can be 3 or 4X greater!
A stacked stone wall relies on its own weight and the friction between the stones to hold back the soil. Larger stones work best but be certain the scale of the rock matches the overall look you’re trying to achieve.
I’ve got a collection of retaining wall columns, including superb photos and diagrams, at my AsktheBuilder.com website should you want to dive deep into the subject.
How to Grout Floor Tile
Question #2: Tim, on my vacation I’m going to install a new tile floor. I’m pretty confident I can do this job, but I’m nervous about the grouting aspect. I don’t want to have horrible messy grout that crumbles and cracks over time. Can you share any tips so I get it perfect? Steve, Spokane, WA
If I had a dime for every how-do-I-grout question that’s been typed into my Ask Tim form, I’d have quite a high pile of dimes! The most important thing to know about grouting tile is water is your frenemy. That’s a new word meaning it’s both your friend and your enemy.
Many homeowners have the desire to do tile work. I love love love this attitude.To offer a free helping hand and share years worth of experience, I went to the trouble to create a detailed four-part-video series about how to grout floor tile. The videos are all on one page on my website.
You need the right amount of water in the grout so it’s workable, but not so much that the grout is soupy. Too much water dilutes the Portland cement that designed to hold the grout together for decades.
A small amount of water is needed to lubricate the face of the tile and the hard-rubber float you’ll use to spread the grout. Lots of water is required, as well as a special grout sponge, to clean off all excess grout from the tile.
Most grouting failures happen at this stage of the job. You might have too much water in the sponge and this water dilutes the cement paste in the hardening grout. It’s so important to squeeze every drop of water out of the sponge before you run it across the tile to remove excess grout.
The best advice I can give you is to build a small test panel. Purchase one 3x5-foot piece of thin cement board and lay it on your garage floor. Cover it with some of the same tiles you intend to install indoors. Allow the adhesive to harden for a day or two. Practice grouting this test panel and work out all your bugs here, not on your real floor inside. Be sure to watch my video series.
Column 1244