Cutting a Roof Rafter

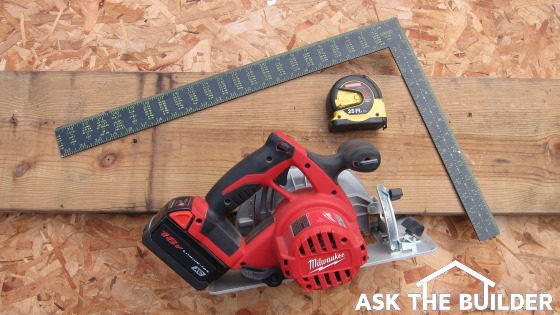
A simple framing square, circular saw and a tape measure are just about all you need to make perfect angled roof rafter cuts. PHOTO CREDIT: Tim Carter
DEAR TIM: I’ve got one last project before winter sets in. I want to build a small shed, but am not sure how to frame the standard gable roof. I can handle placing the framing square to make the plumb and heel cuts, but I’m confused on how to arrive at the exact length of the angled roof rafters. This is above my current pay grade. Is there a crash course you can teach on how to get the length of the rafter just right? Tommy T., Stowe, VT
DEAR TOMMY: I distinctly remember being in the same situation many years ago as a rookie carpenter. Roof framing was a vast mystery to me, but I was eager to learn and started reading all sorts of books about the subject. Soon I was able to frame very complex roofs and the cuts came out great. I did make a few bonehead mistakes, but I’m not going to let that happen with you on this simple shed roof.
The gable roof, in my opinion, is perhaps the easiest roof to frame outside of a flat roof. To frame a gable roof, all you really need is a framing square that has crisp dimension markings on it as well as all the tables that one normally sees printed on the body of the square.
To get your head around the math that’s involved, Let’s just think about a line drawing. After all, the top edges of the two roof rafters really are just two of the three lines in a triangle. The base of the triangle would be the straight line that connects the two sloped lines where they pass over the outside surface of the exterior walls. In other words, roof framing is just basic trigonometry.
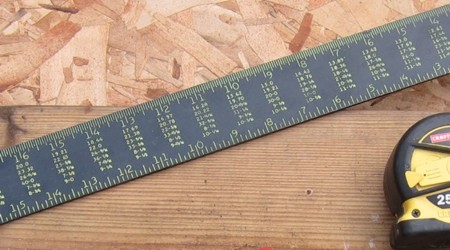
Good framing squares already have done the tough math for you. If you have one of these framing squares, look at the body of the square. This is the part that’s almost always 2 inches wide and 24 inches long. On it you’ll see a table. Usually the first line of the table reads: Length of Common Rafters per Foot of Run. You may have to look at both sides of the square to see this table.

Note - there are all sorts of numbers, usually with decimal points, under the inch markings on the square. You should see the number 20.0 under 16 inches, the number 16.97 under 12 inches and 12.65 under the 4 inch mark. This tells you you’re looking at the correct line in the table.
These numbers with the decimal points, are the multipliers that will give you the exact length of the rafter along it’s sloped line. All you need to do is provide the “run." Run is HALF of the width of the shed across which the roof covers. If your shed is going to be 20 feet wide, then the run would be 10 feet. I always measure the total width to the outside face of the wall sheathing.
The only other thing you have to decide is the pitch of your roof. That’s what the inch markings on the body of the square represent. For sake of discussion, let’s say that you want a 4-12 pitch roof. Using the number from the table on the square, you would multiply 12.65 times 10 to get the length of the common rafter. I say this assuming your shed is going to be 20 feet wide.
Doing the math, you’ll see that the length of the rafter is 126.5 inches. Here’s where it can get a little confusing. This is the true mathematical length of the rafter assuming there is no ridge board. In other words, if you cut two of these rafters exactly the same and set them up on the wall plates, the plumb cut lines at the top would fit perfectly with no gap at all. The same would be true for the heel cut down where the rafter sits on the wall.
But in practice, there’s almost always a ridge board in common roof framing. It’s usually a 2x piece of lumber. If this is what you’re going to do, then you have to shorten the length of the rafter by HALF the thickness of the ridge board. It’s half because the ridge board is centered between the two rafters that touch the ridge board.
Now, understand that this doesn’t mean your rafter length is 3/4 inch shorter than the 126.50 inches. It’s close to that, but not exactly.
What I always do is make the accurate plumb cut line on the lumber as if there is no ridge board. This is the true length of the rafter. But then measure out from this plumb cut line perpendicular the 3/4 inch shortening dimension. Now draw a second parallel plumb cut line next to your first one. This line needs to be down the rafter making it shorter, not longer. I made that mistake many moons ago!
The plumb and heel cut lines are made conveniently by a framing square because a square is a 90-degree angle. The tongue of the square, which is almost always 16-inches long, is oriented 90 degrees to the body of the square.
Since the plumb cut is absolutely the vertical line of a right triangle and the heel cut is the base of a right triangle, you can see how the framing square creates these lines as you slide it up and down the rafter with it set at the proper pitch.
It’s caveman simple when you see it done. This is why it’s important to use the small brass stair gauges on a square so its orientation doesn’t vary as you slide it up and down the rafter.
For more information, read my How to Cut a Simple Common Roof Rafter column.
Column 904
2 Responses to Cutting a Roof Rafter